The radiator came to life with its familiar metallic ticking, a sound usually linked to comfort. Outside, cold wind slipped through bare branches, tapping at the windows like a warning of what was coming. Indoors, the room was technically warm, yet the air felt thin, dry, and irritating. Your throat felt scratchy, your hands tight with dryness, and your nose lingered on the verge of a sneeze.
A Small Habit Remembered From Long Ago
A memory surfaced—something an older relative once mentioned or a tip seen online—about placing a glass of water near a radiator. It sounded outdated, almost superstitious. Still, as the evening dragged on and the dryness worsened, you filled a glass and set it beside the heater. As the water slowly warmed, the atmosphere began to shift in a quiet, unannounced way—exactly how winter changes usually arrive.
The Simple Science Behind a Glass of Water
The idea that a single glass of water could make a room feel warmer, without increasing heating costs, sounds unlikely. Water doesn’t generate heat and certainly isn’t a secret heat source. The real benefit is subtler. It doesn’t add warmth—it helps your body feel the warmth that’s already there.

When a radiator runs, it heats the room while also pulling moisture from the air. This drying effect often goes unnoticed at first. You might feel it through itchy skin, scratchy throats, static shocks, or small jolts from metal objects. What’s easier to miss is how dry air quietly alters how your body experiences temperature.
Why Dry Air Makes Warm Rooms Feel Colder
Your body is constantly exchanging heat with its environment. In dry air, moisture evaporates faster from your skin and with every breath you exhale. That evaporation draws heat away from your body, creating a mild cooling effect—even when the thermostat hasn’t changed. The radiator may be working just fine, but your body doesn’t fully agree.
Placing a glass of water near a heat source allows it to warm and slowly release moisture into the air. Even a small increase in humidity can reduce moisture loss from your skin and lungs. The temperature stays the same, yet the room feels softer, warmer, and easier to breathe in.
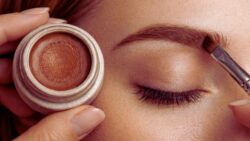
Aloe Vera as a Gentle Brow Solution
Aloe vera has calmed and cared for skin for generations, long before it became a labeled product. Pure aloe gel feels cool, lightweight, and smooth, never stiff or sticky. On eyebrows, it works quietly, offering control without harshness.
In a homemade brow gel, aloe serves as the foundation. Its natural consistency provides light-to-medium hold, guiding brow hairs while keeping them flexible. When you choose a high-quality gel with minimal additives, it also adds gentle hydration, turning everyday grooming into a moment of care rather than correction.
Cocoa Powder for Soft, Natural Definition
Cocoa powder brings warmth, richness, and natural pigment. Its deep brown tone works surprisingly well as a brow tint, especially for light to medium-dark shades. When blended with aloe, it creates a soft tint rather than a bold, painted look.
This ingredient offers control. A small amount adds subtle definition, while a little more deepens the shade. The color blends smoothly into natural brows, avoiding harsh edges. There’s something quietly satisfying about using the same ingredient found in the kitchen to gently frame your face.

Turning Brow Care Into a Simple Ritual
Making your own brow gel feels less like a cosmetic chore and more like a calm ritual. Clean jars, a small spoon, a spoolie brush—each item plays its part. The process is slow, tactile, and grounding.
At its core, the formula relies on just two ingredients. Optional additions, such as a drop of jojoba oil for smoothness or a pinch of coffee or charcoal for deeper tones, can be explored later. The beauty of this recipe lies in its simplicity and restraint.
- Pure aloe vera gel (2 teaspoons): Provides natural hold, smooth application, and hydration
- Unsweetened cocoa powder (¼–½ teaspoon): Adds soft, natural color for brow enhancement
- Small clean glass jar: Stores the finished gel safely
- Clean spoolie or angled brush: Shapes and applies the gel evenly
- Mini spoon or mixing stick: Helps blend the ingredients smoothly
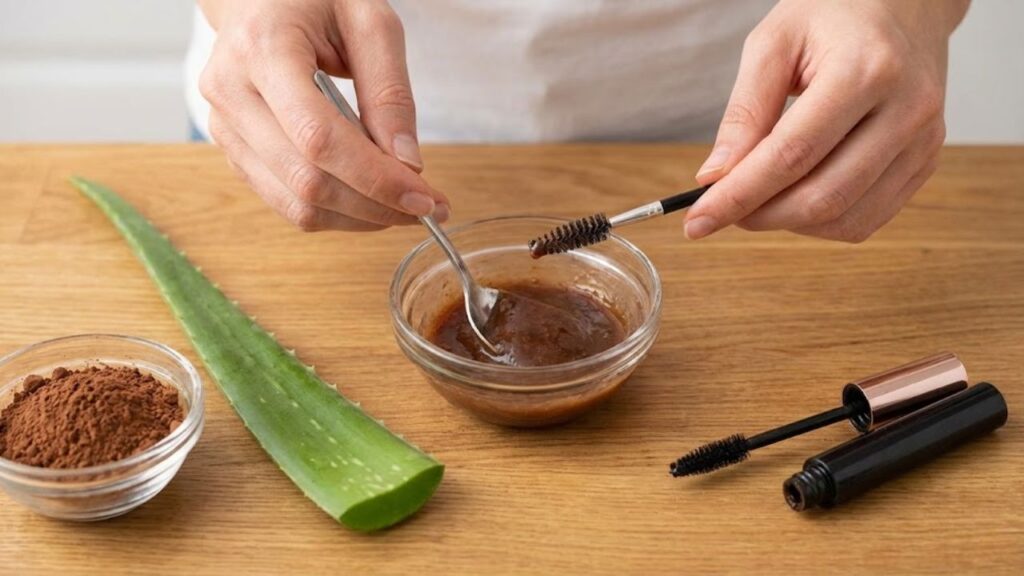
Blending the Gel Slowly and Evenly
Add two teaspoons of aloe vera gel to a clean jar. Sprinkle in about a quarter teaspoon of cocoa powder and stir slowly, pressing out any clumps. The clear gel gradually transforms into a smooth, earthy brown.
Test the shade on the back of your hand and let it dry briefly. Adjust as needed—more cocoa for depth, more aloe for softness. The final texture should be creamy, spreadable, and able to cling to a brush. Once blended, seal the jar and let it rest for about an hour so the mixture settles evenly.
Applying With Care and Intention
This homemade gel naturally encourages a slower routine. Start with clean, dry brows. Lightly dip a spoolie into the jar and remove excess product. Brush through the brows using short, gentle strokes that follow the natural hair growth.
Begin at the inner brow and move outward, shaping rather than drawing. For extra definition, allow the first layer to dry before adding another, focusing on sparse areas. An angled brush can help create hair-like strokes. The finish stays soft, flexible, and natural-looking.
Simple Choices With Lasting Meaning
Creating a small product at home carries quiet meaning. It reduces waste, limits unnecessary ingredients, and reconnects you with the act of making something by hand. Each refill replaces another disposable tube. Each use reinforces that beauty doesn’t have to be complicated.
Natural solutions are personal, and paying attention to your skin matters. Patch testing is important, and small adjustments are part of the process. Still, there’s value in slowing down, stirring carefully, and shaping your brows with intention. In that small moment—brush in hand, cocoa-scented gel nearby—you’re reminded that beauty can be gentle, practical, and deeply personal.