The woman standing in front of her bathroom mirror looks almost the same as she did at 25, but not entirely. Her cheeks sit a little lower now, and the soft fullness that once lifted when she smiled blends more gently into her jawline. She reaches for her familiar blush brush and follows the habit she has used for years—smiling and dusting color onto the apples of her cheeks. Then she pauses. Instead of looking fresh, her face appears heavier. The blush pulls everything downward. Shadows under her eyes seem deeper, and the center of her face looks slightly puffy.
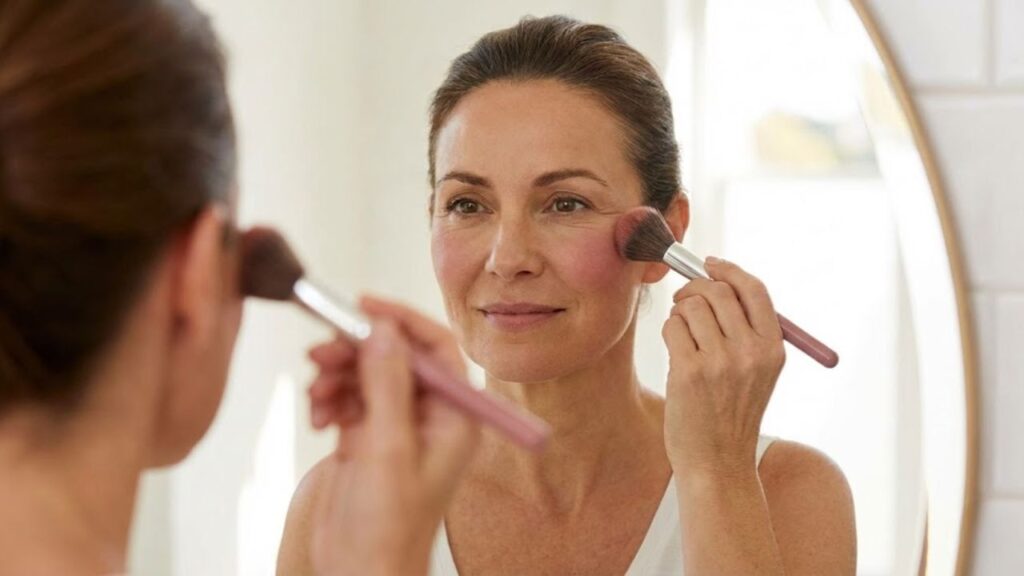
She wipes the color away and tries again, this time placing it a touch higher. The change is immediate. Her cheekbones look sharper. Her face appears lifted, and her eyes look more awake. It is the same blush, on the same person. The only difference is where it was applied. The product didn’t change—the placement did.
Why Classic Blush Placement Starts to Fail After 30
There is a quiet stage of life when a makeup routine that once worked effortlessly begins to feel off. It doesn’t happen overnight. You simply notice that familiar techniques no longer give the same result. Blush is often the first thing that feels wrong. When applied low and round, it can make a 32-year-old look tired by mid-afternoon. The shade that once looked bright on the apples of the cheeks now settles closer to the soft lines around the nose and mouth.

Instead of adding structure, the color gathers in areas that draw attention to the center of the face. At this point, where you place blush becomes more important than which blush you use. A makeup artist in London once explained that she can often guess someone’s age simply by watching how they apply blush. Younger clients tend to place it directly in the center of the cheeks. People over 30 often continue doing the same thing, even though their facial structure has subtly shifted.
She recalled working with two sisters, aged 28 and 38, who shared similar skin tones and used identical products. On the younger sister, blush on the apples of the cheeks made her entire face glow. On the older sister, the same placement emphasized the faint hollows under her eyes. When the artist moved the blush higher toward the temples, the 38-year-old instantly looked more rested. The color redirected attention to her eyes and cheekbones, rather than the middle of her face.
The reason is simple. After 30, your bone structure stays the same, but the fat beneath the skin slowly shifts downward. The rounded area of the cheek moves lower, yet muscle memory still guides your hand to where that fullness used to be. Applying color there only highlights the drop. Moving blush slightly up and outward creates a lifted effect. You are not changing your features—only changing where the eye lands first.
A Modern Blush Placement That Creates a Natural Lift
The blush technique gaining attention now is refreshingly simple. Instead of smiling and applying color to the apples of your cheeks, keep your face relaxed and look straight ahead. Imagine a diagonal line running from the top of your ear toward the side of your nostril. Apply blush along the upper half of that line, closer to the ear than the nose.
The shape should resemble a soft, slanted curve that gently points toward the outer corner of the eye. Blend the color upward into the temples, not down toward the center of the face. Let it fade gradually toward the hairline, creating a light, diffused finish. For many people over 30, this placement immediately reveals cheekbones they thought they had lost.
One small adjustment makes a noticeable difference. Leave a clean gap between the under-eye area and where the blush begins. About a finger-width of bare skin helps prevent color from settling into fine lines or exaggerating dark circles. If you like a subtle flush, you can add a hint of color across the bridge of the nose, but keep the main focus high and toward the outer face.
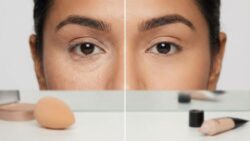
Many people want a healthy glow without looking overdone. That concern is valid, since heavy blush placed too low can look harsh. This is why placement matters more than quantity. Start with less product than you think you need. Tap it on gently and build color in thin layers rather than applying one dense sweep. Cream or liquid formulas often blend more naturally into mature skin, rather than sitting on top of texture.
In real life, makeup routines are rarely perfect. You may be getting ready quickly or multitasking. Instead of remembering every detail, hold onto one simple rule: higher and further back. On a tired day, that small shift can make your entire face look more awake and aligned with how you feel inside.
Key Points to Keep in Mind
- Think in angled lines instead of round circles when applying blush.
- Keep the strongest color away from the nose and mouth area.
- Blend upward into the temples to create a lifting effect.
- Choose cream or liquid formulas if powder emphasizes texture.
- Revisit your blush placement every few years as your face naturally changes.
How Blush Becomes a Quiet Confidence Reset Over Time
There is something surprisingly powerful about changing how you apply a product you’ve used for years. It means acknowledging that your face has evolved and choosing to work with it. A simple diagonal sweep becomes a small adjustment that changes how light and shadow move across your features.
Many people share moments of catching their reflection and feeling unfamiliar. Remapping blush doesn’t erase that feeling, but it can soften it. The right placement highlights structure and expression without pulling everything downward. It doesn’t try to recreate youth, but it supports the face you have now.
This shift is often shared quietly. Once you see the difference, it’s hard not to show someone else. Applying blush one way on one cheek and the new way on the other often speaks louder than any tutorial. Over time, blush becomes less about trends and more about understanding your own facial architecture.
There is no single diagram that works for everyone, just a guiding idea. Color that moves upward tends to signal energy and freshness. Color that pools in the center can suggest fatigue. That may be why this technique keeps resurfacing—it doesn’t require new products. You are simply moving what you already own a few millimeters higher.
Placement Adjustments and Visual Benefits
- Apply blush higher toward the temples to create a natural lifting effect.
- Leave space under the eyes to reduce the appearance of dark circles and fine lines.
- Blend in soft diagonals rather than circular motions for a more refined look.