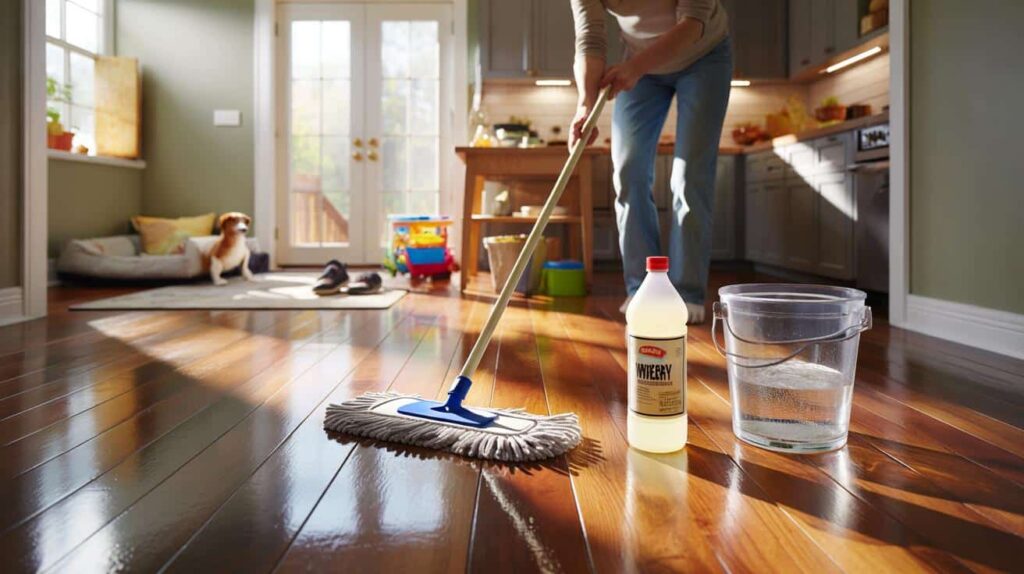
The first time I saw hardwood floors that actually gleamed, it wasn’t in a showroom. It was in a slightly cluttered, lived-in kitchen where a dog bed sat in the corner and a Lego was waiting to ambush a bare foot. Sunlight from the back door hit the boards and they didn’t just look clean. They looked like someone had quietly swapped them for new ones overnight.
The owner, a retired nurse with a coffee mug that said “Probably Late,” laughed when I asked which fancy product she was using. She walked to a low cupboard, pulled out a bottle from the pantry and shrugged.
“It’s this,” she said.

That one bottle changed how I look at dull floors forever.
The pantry bottle that makes hardwood floors glow
The magic item isn’t some viral, impossible-to-find cleaner. It’s plain white vinegar, the same cheap bottle you probably splash into salad dressing or use when you’ve run out of lemon. On hardwood floors, diluted properly and used with a gentle hand, it can bring back a surprisingly deep, clear shine. Not the plasticky glare of wax build-up, but the quiet gloss you see on well-cared-for wood.
Walk into a home where someone has been using a light vinegar solution for years and you notice the floors before you notice the furniture. The boards look awake. The grain looks sharper. And the room instantly feels more expensive than it actually is.
One homeowner I spoke with, a father of three in a 1920s house, had given up on his battered oak floors. Between scooter wheels, spilled milk, and one unforgettable slime incident, the finish looked tired and cloudy. He’d tried store-bought “shine boosters” that promised miracles and left a streaky film instead.
At some point, he landed in a late-night rabbit hole of cleaning forums and decided to try the vinegar trick. He mixed it, mopped once, let it dry, and then walked back into the room. “I thought the lights were brighter,” he joked. The fogginess had gone. The wood wasn’t new, but it finally looked clean instead of just not-dirty.
There’s a simple reason this pantry staple works so well when used properly. The acidity in white vinegar breaks down the thin, invisible film that builds up from soap residues, cheap cleaners, and everyday grime. That film is what makes floors look flat and lifeless, even right after mopping. Strip the film away gently, and the original finish can actually catch the light again.
*What vinegar doesn’t do is magically repair scratches or replace a damaged finish.* It reveals what your floor already has to offer. Used sparingly, diluted, and never left to pool, it becomes less of a “hack” and more of a quiet maintenance ritual that keeps the wood’s natural beauty visible.
The step‑by‑step vinegar method homeowners quietly swear by
The method most homeowners rave about is surprisingly simple. Start by sweeping or vacuuming slowly, really getting that fine dust out of corners and between boards. Dust is what creates micro-scratches, and there’s no point polishing over hidden grit. Then grab a clean bucket and mix your solution: about one half cup of white vinegar per gallon of warm water. No more. This is a case where “extra strong” just means “extra risky” for your finish.
Use a slightly damp microfiber mop, not an old string mop dripping like a wet towel. Dip, wring thoroughly, and glide with the grain of the wood. You’re lightly kissing the surface, not soaking it.
Here’s the part almost nobody tells you: the less liquid you use, the better your shine. Standing water is the true enemy of hardwood, not vinegar. We’ve all been there, that moment when you’re tempted to slosh a bit more on “just to get it really clean.” Resist. Go section by section instead. Mop a small area, step back, let it dry, and only then move on.
One Brooklyn renter told me she times it with a playlist. One song per section, then pause. By the time the third song finishes, the first part of the floor already looks clearer and brighter, with no cloudy film and no tacky feel under bare feet.
Let’s be honest: nobody really does this every single day. Most people who swear by the vinegar trick use it once or twice a month, then stick to dry dusting in between. The key is respecting the wood, not attacking it.
“I spent years buying expensive floor products that promised ‘mirror shine,’” says Laura, 42, from Minneapolis. “They’d look great for two days, then turn dull or streaky. With diluted vinegar, my floors don’t scream ‘polished’ — they just quietly look like they belong in a magazine.”
To keep it simple, many homeowners follow a basic routine:
- Dust or vacuum with a hardwood-safe head before any wet cleaning.
- Mix a mild vinegar solution: around 1/2 cup white vinegar per gallon of warm water.
- Use a well-wrung microfiber mop, never soaking the floor.
- Work in small sections and let each one dry quickly.
- Finish with a dry microfiber pass if any damp spots linger.
Living with wood that actually shines back at you
When you step onto a hardwood floor that truly shines, you feel it before you see it. There’s a small lift in your mood, a subtle sense that the whole space is cared for, even if there’s mail on the table and shoes by the door. That’s the quiet power of bringing an everyday pantry staple into your cleaning routine. It isn’t glamorous, and it doesn’t smell like a coastal fig orchard. But it gives you back the real color and character of the boards under your feet.
Some people will stick with branded cleaners, and that’s fine. Others will mix their little bucket of warm water and vinegar, mop in soft lines, and watch as the afternoon light finds the grain again.
Once you see your floor respond, it becomes less of a chore and more of a quick reset for the whole house. One reader told me she does it before guests arrive, right after clearing the kitchen counters; another swears by a Sunday evening mop as her way to close the week. The shine is almost a side effect of something deeper: the feeling that your home is cooperating with you instead of working against you.
You might try the vinegar trick once, doubt it, squint at the boards, and walk away. Then a day later, at a different angle, the light catches, and you notice it — not a fake gloss, but a calm, confident gleam. That’s usually the moment people don’t go back.
| Key point | Detail | Value for the reader |
|---|---|---|
| Use diluted white vinegar | About 1/2 cup per gallon of warm water, applied with a damp microfiber mop | Restores natural shine without expensive specialty products |
| Avoid excess moisture | Work in small sections, wring the mop thoroughly, never leave puddles | Protects hardwood from warping, swelling, and finish damage |
| Focus on regular light care | Dry dust most days, vinegar solution only occasionally | Keeps floors bright and healthy with minimal time and cost |
FAQ:
- Question 1Can vinegar damage hardwood floors?
- Answer 1Used straight or too strong, yes, it can dull certain finishes over time. Used properly — heavily diluted, applied with a barely damp mop, and not every day — most sealed hardwood floors tolerate it very well and look clearer, not damaged.
- Question 2Does this work on all types of wood flooring?
- Answer 2It’s generally safe on sealed hardwood and many engineered floors. It’s not recommended on waxed, oiled, or unsealed wood, nor on some laminate surfaces. When in doubt, test a small, hidden area and check your floor manufacturer’s guidelines.
- Question 3How often should I use the vinegar solution?
- Answer 3For most busy homes, once every one to four weeks is enough. Between those deeper cleans, stick to dry mopping, sweeping, or vacuuming to remove dust and grit without stressing the finish.
- Question 4Can I mix vinegar with other cleaners for extra shine?
- Answer 4It’s better not to. Mixing vinegar with soaps or commercial products can create residue or neutralize cleaning power. Keep it simple: just warm water and white vinegar, then a separate product if your floor pro specifically recommends one.
- Question 5Will vinegar fix scratches and worn spots?
- Answer 5No. Vinegar removes dulling film and light grime so the existing finish can shine again, but it doesn’t repair physical damage. Deep scratches, gray wear paths, or flaking finish usually mean it’s time to talk to a flooring specialist about refinishing.