In a café bathroom, a young woman refreshes her lips without realizing anyone is watching. A few people waiting nearby quietly notice her routine. She glides a pencil across her lips in two quick strokes, presses them together, and finishes with a touch of gloss. There’s no heavy overlining, no detailed contouring. When she looks in the mirror, her lips appear soft, rested, and naturally full, as if she’s just returned from a relaxing break.
The effect is so understated that it’s hard to pinpoint what she’s done. There’s no harsh outline or dramatic border—just a subtle sense of dimension. Later, you try to recreate the same look with the same pencil and gloss. Yet your lips still seem flat. The difference lies in a tiny detail: where the pencil was placed. It feels minor, but it changes everything.
This Isn’t About Bigger Lips, It’s About Visual Focus
Why the Traditional Lip-Liner Rule Often Falls Short
Most classic advice suggests tracing slightly outside your natural lip line, blending, and filling everything in. For years, that approach worked well enough. But on real faces, in daylight, heavy overlining can feel disconnected. Instead of enhancing features, it can make lips look out of sync with the rest of the face, especially up close or under natural light.
 Goodbye Hair Dye: The Rising Grey Hair Coverage Trend Helping Women Appear Younger Naturally
The Quiet Shift Modern Lip Artists Are Making
Today’s top makeup artists are taking a more refined path. Rather than chasing the illusion of dramatically larger lips, they focus on guiding the eye to specific areas. Any visible fullness is a side effect, not the goal. This is why the technique translates so well on camera—from selfies to video calls—and still looks convincing in everyday conversation.
Why Millimetres Matter More Than Bold Lines
The real transformation comes from tiny adjustments, not thicker outlines. Once you notice where the liner is actually applied, your understanding of lip definition shifts. It’s not about reshaping your mouth, but about emphasizing the natural structure already there. This micro-precision keeps lips looking believable, soft, and subtly enhanced rather than obviously drawn.
Where Makeup Artists Truly Place the Liner
A quick scroll through social media reveals a pattern. Artists barely define the corners of the mouth. Instead, they focus pigment on three key areas: the peak of the Cupid’s bow, the center of the lower lip, and the small, off-center “pillows.” Around the edges, the liner is diffused and barely there—more suggestion than statement.
Why the Result Feels Effortlessly Natural
A London-based makeup artist once explained that she uses the same lip pencil on every client, changing only the placement depending on how light hits their lips. People often ask which filler clinic she recommends. She simply smiles and mentions a £7 lip liner and a grainy video of her technique. The most common response she hears is, “I don’t know what you did, but I look rested.” The true effect isn’t just fullness—it’s balance, with the mouth finally in harmony with the face.
The Science Behind Why This Technique Works
Our eyes don’t scan faces evenly. They jump to areas of contrast and shifting shape. The dip of the Cupid’s bow, the curve at the center of the lower lip, and the spots where light naturally reflects all draw attention. By enhancing these points and softening the corners, the brain reads the lips as fuller without needing a bold outline.

The Exact Placement That Creates Fullness Without Overlining
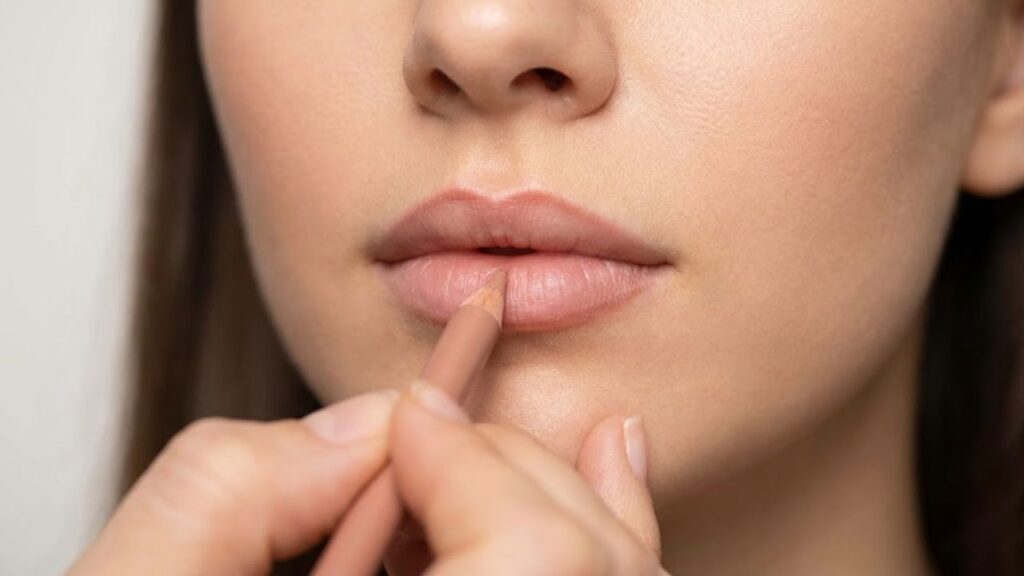
Begin with dry lips and a relaxed mouth—no posing. Use a sharpened nude liner that matches your natural lip tone. Draw a small bridge across the Cupid’s bow, gently connecting the two peaks just above the natural dip. Avoid a sharp M shape; aim for a softened plateau.
Next, move to the center of the lower lip. Place the pencil about one millimetre outside your natural line only at the fullest point. Sketch a short arc no wider than your iris when looking straight ahead. Leave the outer thirds mostly untouched. Connect these central points to the corners with feather-light strokes that fade as they move outward.
Lightly smudge with a fingertip and tap a hint of gloss or balm only in the center. The middle appears pillowy, the edges stay soft, and the reason why isn’t obvious. Restraint is essential. Adding more height or definition at the sides quickly turns this into full overlining, which may look fine on a phone screen but not under harsh lighting.
Work in stages. Define the center first, step back from the mirror, then gently connect toward the corners only if needed. Learning this on a quiet day makes it easy to apply later almost by muscle memory.
Why This Soft-Blur Method Works on Real, Unfiltered Faces
This placement appeals not just visually, but emotionally. On a difficult morning, drawing sharp lines can feel rigid. This approach feels more like enhancing what’s already there. People notice that you look refreshed, not heavily made up.
It also allows room for imperfection. Slight hand tremors or uneven lines don’t ruin the effect because the overall impression matters more than precision. Under different lighting—from bright bars to soft restaurants—the lips retain definition in the center while staying natural at the edges. They move with your expressions instead of looking stiff.
Key Principles Behind the Technique
- Central focus: Liner is applied mainly to the Cupid’s bow and the center of the lower lip, creating instant volume without harsh borders.
- Softened corners: Minimal or no liner at the mouth’s corners, lightly blurred, keeps the look balanced and natural in daylight.
- Targeted shine: Gloss or balm placed only at the center enhances dimension where light naturally hits.